10-12 Human Background Blurring Sample Tutorial
In the previous chapters, we learned various techniques for “finding things”: finding cars, finding faces, and even accurately detecting the 21 keypoints of fingers. The way we handled AI results was usually the same: after obtaining coordinates, we used OpenCV to “draw boxes, points, and lines” on the image.
But what if the customer’s requirement today is: “I want to keep the person in the video, just like Google Meet or Teams, but blur the messy room background behind them”?
Welcome to another field of image AI: image segmentation and processing. In this chapter, we will introduce the “human background blurring model.” Here, your development mindset will undergo a major shift: we will no longer manually draw graphics ourselves. Instead, the AI engine will directly calculate and output a processed high-quality image for us at the lower level.
Learning Objectives
Through this chapter, you will learn:
1. A brand-new Custom API : Use the property-setting API to dynamically adjust the background blur intensity, namely the Gaussian blur size.
2. Declaring an ImageBuffer : Learn how to manually allocate a block of memory so the AI engine has space to output the “entire processed image” to us.
3. A complete change in drawing logic : No longer use cv::rectangle or cv::line. Instead, directly convert the memory array output by the AI into an OpenCV image and replace the original image.
4. Destructor and memory management : Properly release the ImageBuffer we allocated to avoid memory leaks.
Preparation
This model package is slightly different from previous ones. Please locate the Segmentation Person model archive. Its filename may include wording such as SEGMENTATION.PERSON. After extracting it, copy QDEEP.OD.SEGMENTATION.PERSON.LIGHT.CFG (the configuration file) and all corresponding weight files into the build output directory of your Qt project.

How Should the Core API Be Changed?
Open your project and change the model configuration type. In QDEEP_CREATE_OBJECT_DETECT , change the Enum to QDEEP_OBJECT_DETECT_CONFIG_MODEL_HUMAN_BACKGROUND_BLURRING。
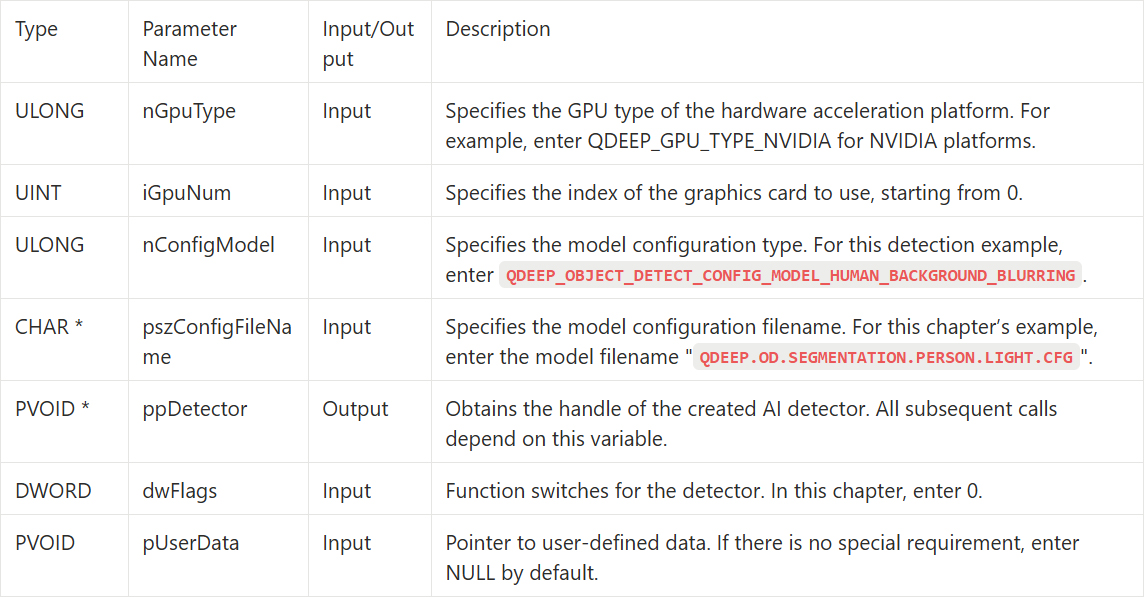
QDEEP_CREATE_OBJECT_DETECT
This is the most critical API for creating the AI engine and loading the “brain” (model). Users must initialize the detector through this API.
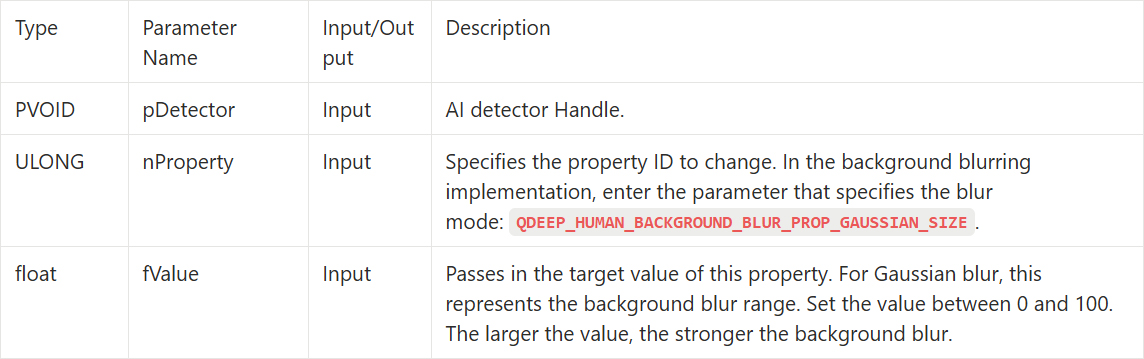
QDEEP_SET_OBJECT_DETECT_CUSTOM_PROPERTY
After loading the background blurring model, we need to use a brand-new Custom API to communicate with the AI engine and dynamically adjust the strength of the effect. This API provides great extensibility, allowing you to configure specific property values according to your needs.
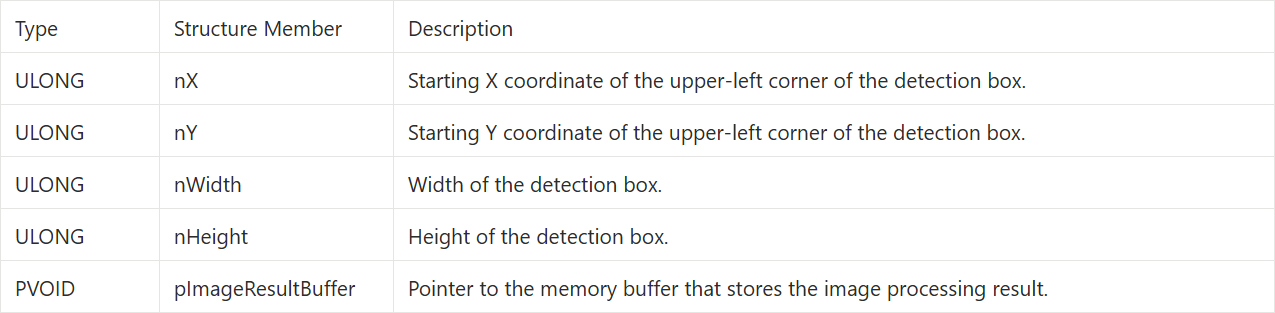
QDEEP_OBJECT_DETECT_BOUNDING_BOX Structure
In our previous implementations, the QDEEP_OBJECT_DETECT_BOUNDING_BOX structure returned by the AI usually only filled in nX, nY (coordinates), or sKeypoints (skeleton points). However, in advanced models such as “image segmentation” or “background blurring,” what the AI returns to us is no longer just a few numbers, but a complete image.
For this purpose, a dedicated pointer parameter is prepared in this structure: pImageResultBuffer. Before the AI engine starts, the developer must manually allocate a sufficiently large memory space and bind it to this pointer. After the AI finishes processing the background blur, it will directly write the calculated high-quality image pixels in BGRA format into this memory block for us to retrieve.
Writing the Core Code
Open your project, and let’s make the core code changes.
Model Loading and Custom API Settings
In the constructor MainWindow::MainWindow(...) , switch to the background-blurring-specific model setting QDEEP_OBJECT_DETECT_CONFIG_MODEL_HUMAN_BACKGROUND_BLURRING. After creating the detector, we need to call a brand-new API: QDEEP_SET_OBJECT_DETECT_CUSTOM_PROPERTY. It allows us to dynamically adjust various parameters of the underlying algorithm. This time, we will set the “background blur range (0~100).”

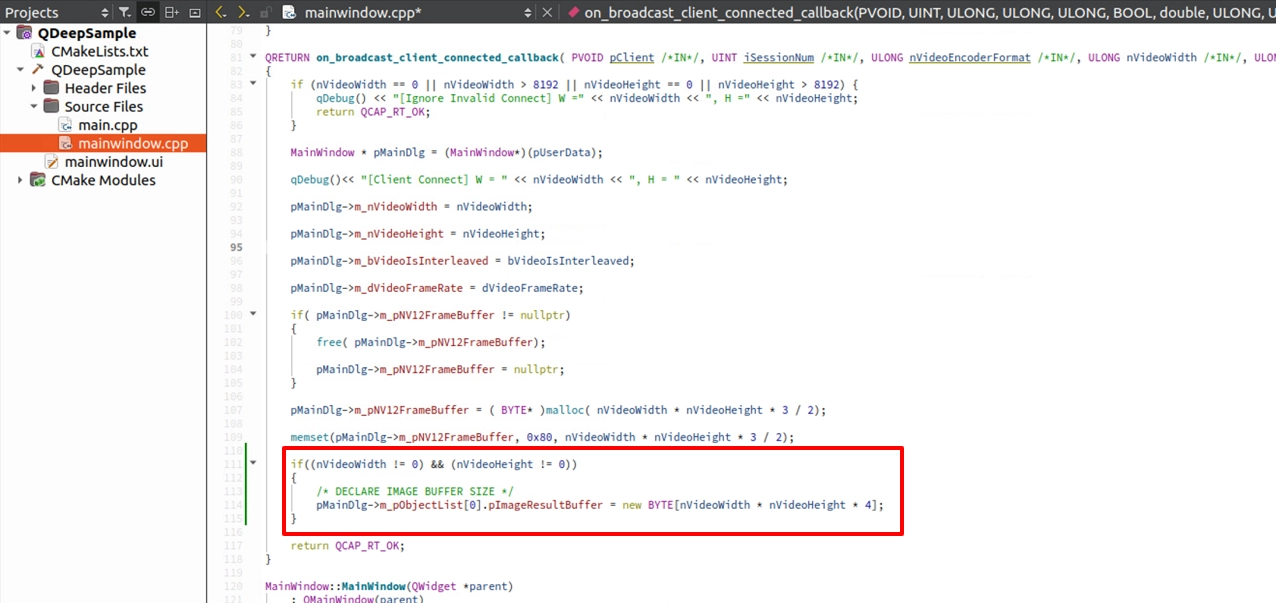
Declare the ImageBuffer When the Connection Succeeds
Previously, the AI only returned “a few coordinate values,” so the memory usage was very small. But this time, the AI will return an “entire image after background blur processing.” Therefore, we must prepare a sufficiently large “container (Buffer)” ourselves and bind it to m_pObjectList for the AI to use. Please go to on_broadcast_client_connected_callback when the image resolution is obtained.
Modify the OpenCV Drawing Method
Go to the on_video_decoder_broadcast_client_callback callback function. The drawing logic here will undergo a major reversal: we no longer draw boxes. Instead, we directly take out the ImageBuffer filled with the AI’s processed result and use it to replace the original image.

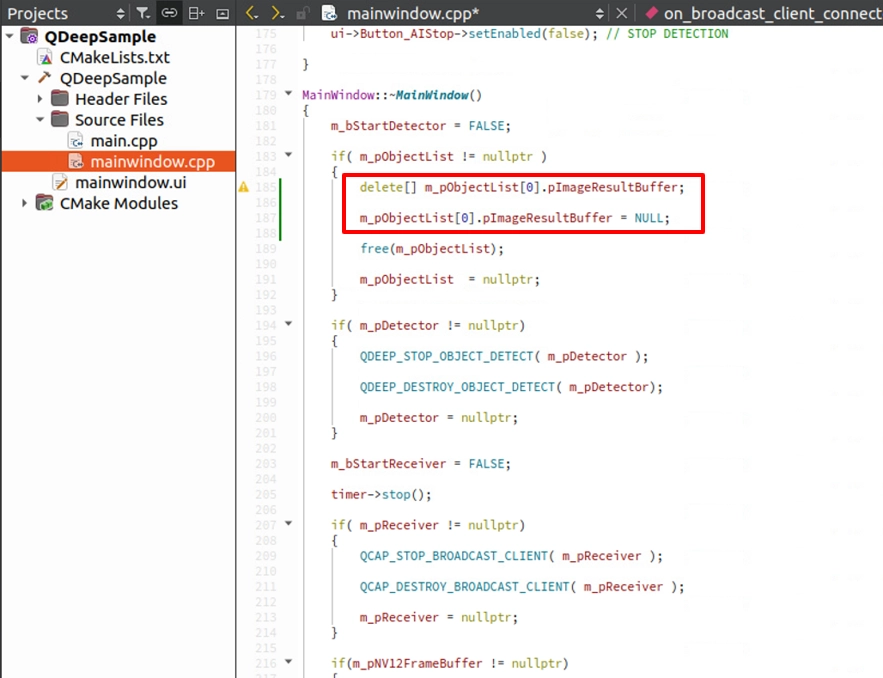
Destructor and Resource Release
A core rule of C++: if there is new, there must be delete. In the steps above, we manually used new to allocate a very large ImageBuffer memory block. If we do not release it when closing the program or pressing the Stop button, it will cause a serious memory leak. Please make sure to add the memory release operation in the destructor ~MainWindow().
Final Verification
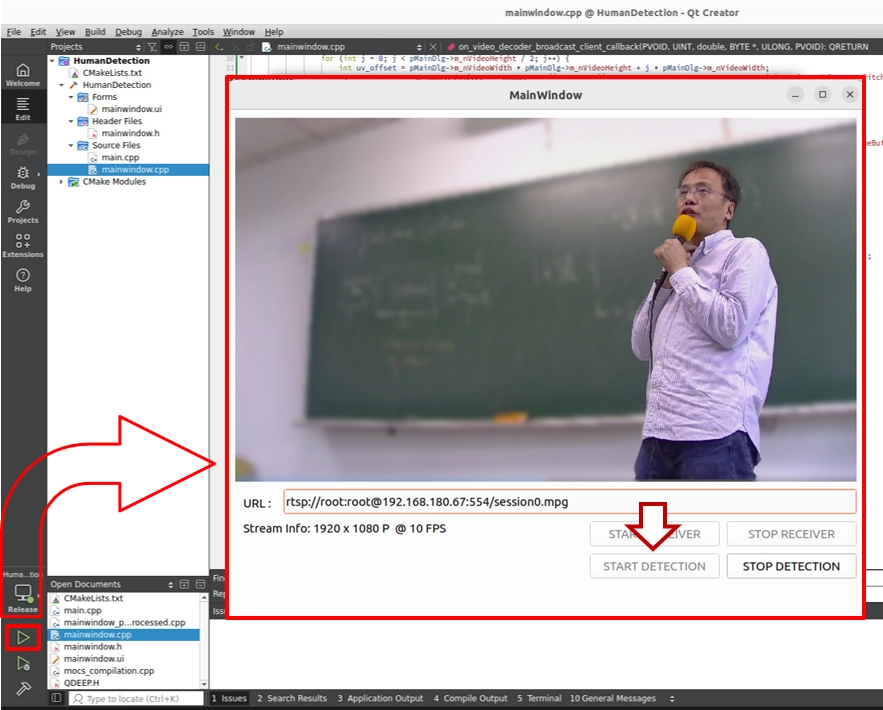
Click “Build and RUN” in the lower-left corner to run the project:
1. Start receiving and detecting.
2. Walk in front of the camera and look at the background behind you.
➤ Helpful reminder (very important): When you first open this software (run the program), the interface may take a short moment to appear. Please do not worry. This is because we wrote the “load AI model” logic inside the constructor. During the first execution, the model must perform initialization configuration, and the system is working hard to load the large neural network weight files into the GPU. Once the software opens successfully after the first load, it means the AI brain is ready in the background. The next time you open the software, this initialization wait time will no longer be needed.
You will notice that you remain clear and sharp in the image, while the office, clutter, and background behind you are all covered with an extremely smooth “Gaussian blur.” If you want to try an advanced challenge, you can add a “slider (QSlider)” to the UI and bind the slider value to the Custom API parameter. Then you can create a professional video effects application that allows real-time adjustment of the background blur intensity.
Through this chapter, you have not only stepped beyond pure “object detection,” but also mastered advanced memory Buffer management and image channel conversion (BGRA to BGR) techniques. This means that no matter how complex the AI image processing model you encounter in the future, you already have strong low-level control capabilities.