10-13 Human Virtual Background Sample Tutorial
Welcome to another application of image segmentation: virtual background replacement. In this chapter, we will continue using the image segmentation “brain” from the previous chapter, but this time we will unlock an advanced version of the Custom API. You will learn how to convert an external image into a data stream and inject it directly into the AI engine, allowing the AI to complete a perfect green-screen-level background removal and compositing process for you.
Learning Objectives
Through this chapter, you will learn:
1. Understanding the advanced property API (_EX) : Upgrade from passing a single numeric value (floating-point number) to passing the array data of an entire background image into the underlying engine.
2. Mastering the resolution limitation of virtual backgrounds : Implement OpenCV image resizing (cv::resize) to meet the underlying engine's strict 1920×1080 size requirement.
Preparation
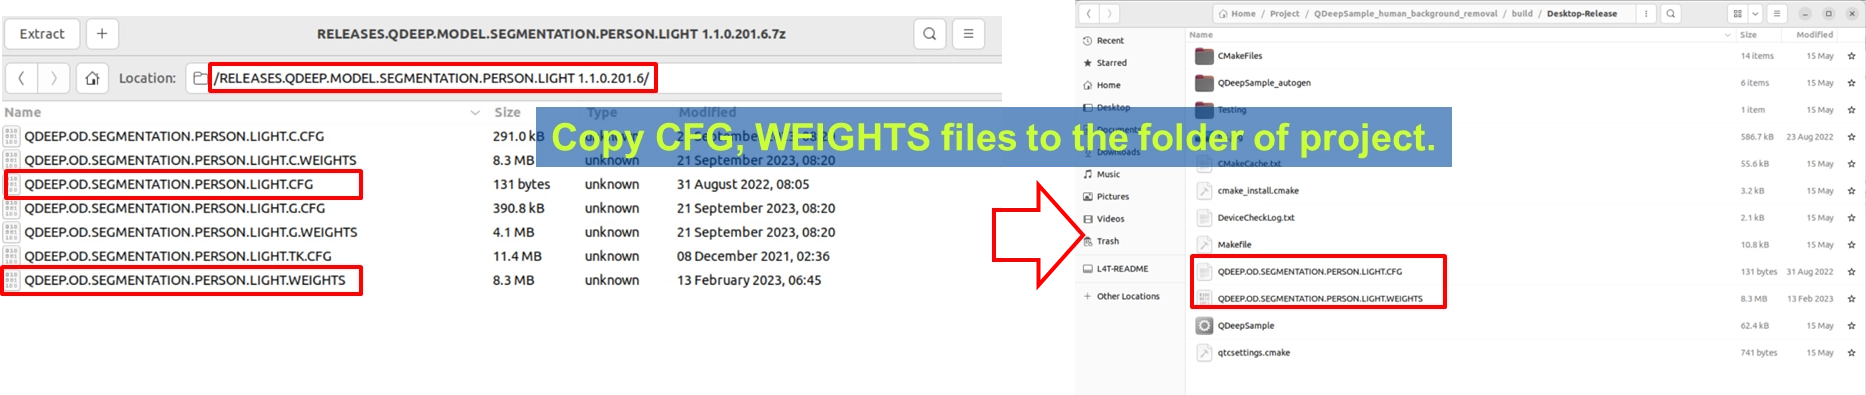
Because both “background blurring” and “background replacement” rely on the underlying technology of “finding the human silhouette (Segmentation),” the model files are fully shared. Please confirm that your project’s build output directory already contains the same files as in the previous chapter: QDEEP.OD.SEGMENTATION.PERSON.LIGHT.CFG and its corresponding weight files.
How Should the Core API Be Changed?
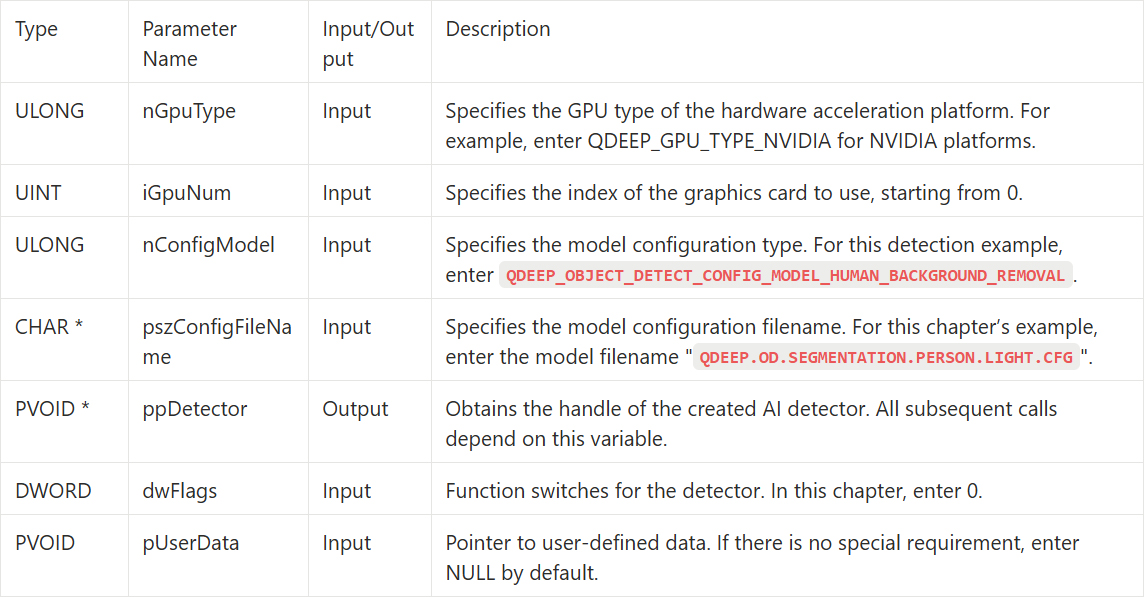
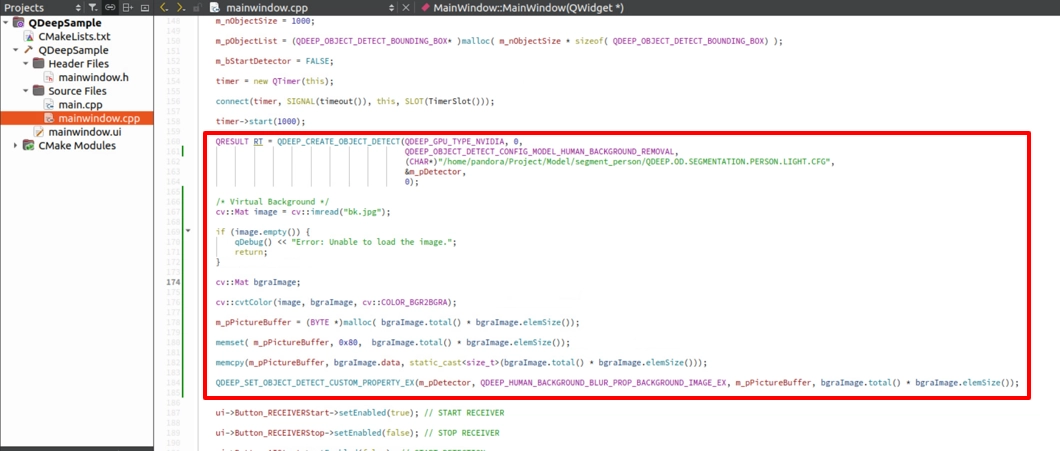
Open your project and change the model configuration type. In QDEEP_CREATE_OBJECT_DETECT, change the Enum to QDEEP_OBJECT_DETECT_CONFIG_MODEL_HUMAN_BACKGROUND_REMOVAL.
QDEEP_CREATE_OBJECT_DETECT
This is the most critical API for creating the AI engine and loading the “brain” (model). Users must initialize the detector through this API.
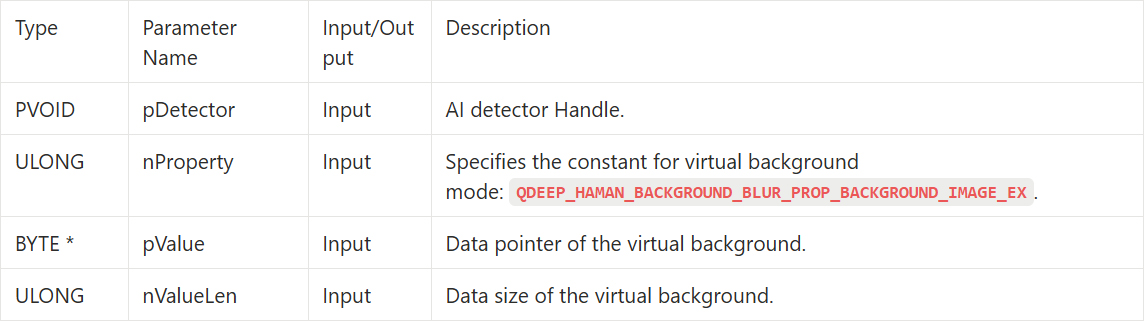
QDEEP_SET_OBJECT_DETECT_CUSTOM_PROPERTY_EX
In 10-12, we used QDEEP_SET_OBJECT_DETECT_CUSTOM_PROPERTY to pass in a 0~100 float value to control the blur intensity. But this time, what we need to pass to the AI is “an image.” Since an image contains a large amount of array data, we must use its extended API:
➤ Please note: currently, virtual background images only support 1920×1080.
QDEEP_OBJECT_DETECT_BOUNDING_BOX Structure
The AI engine will use the pImageResultBuffer parameter in this structure to directly write the calculated high-quality image pixels in BGRA format into this memory block for us to retrieve.

Writing the Core Code
Open your project, and we will make key adjustments to the code from 10-12.
Load the Model, Load an External Image, and Call the _EX API
In the constructor MainWindow::MainWindow(...) , switch to the virtual-background-specific model setting QDEEP_OBJECT_DETECT_CONFIG_MODEL_HUMAN_BACKGROUND_REMOVAL. After creating the detector in the constructor, remove the blur API from the previous chapter and replace it with the following standard S.O.P: “read image, resize, inject.”
First, declare the memory and safely release the image memory in the destructor.
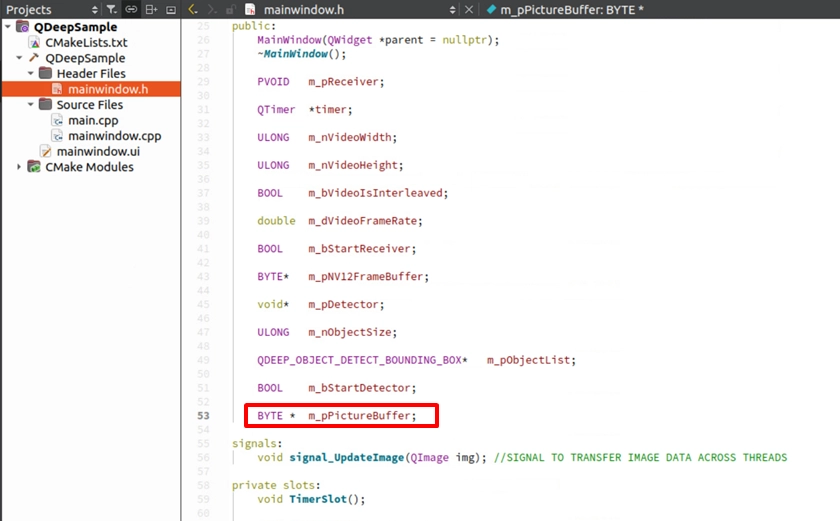
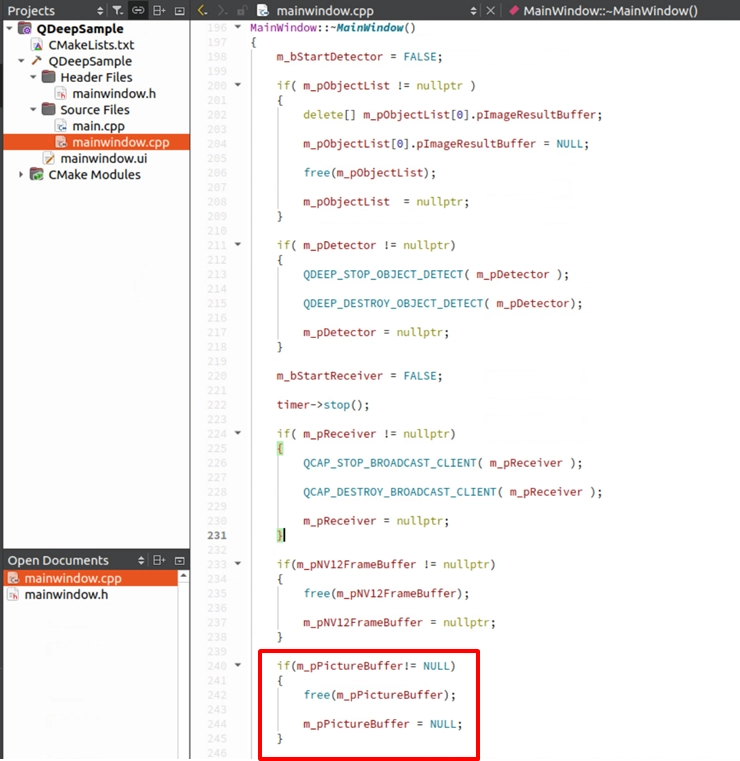
Next, use malloc to allocate memory for m_pPictureBuffer , which we just declared in the header file. The required size is bgraImage.total() * bgraImage.elemSize(). Then use memset to initialize it, and use memcpy to safely copy the converted OpenCV image data into this buffer.
Reuse the ImageBuffer Processing Architecture from 10-12
The next part is very easy. Since the underlying engine still outputs a processed high-quality BGRA image, we do not need to modify the Buffer declaration when the connection succeeds, nor the OpenCV logic that replaces the displayed image.
Final Verification
Click “Build and RUN” in the lower-left corner to run the project:
1. Prepare a landscape image you like in the project’s execution directory and name it bk.jpg.
2. Click “Build and RUN” in the lower-left corner to run the project.
3. Start receiving and detecting.
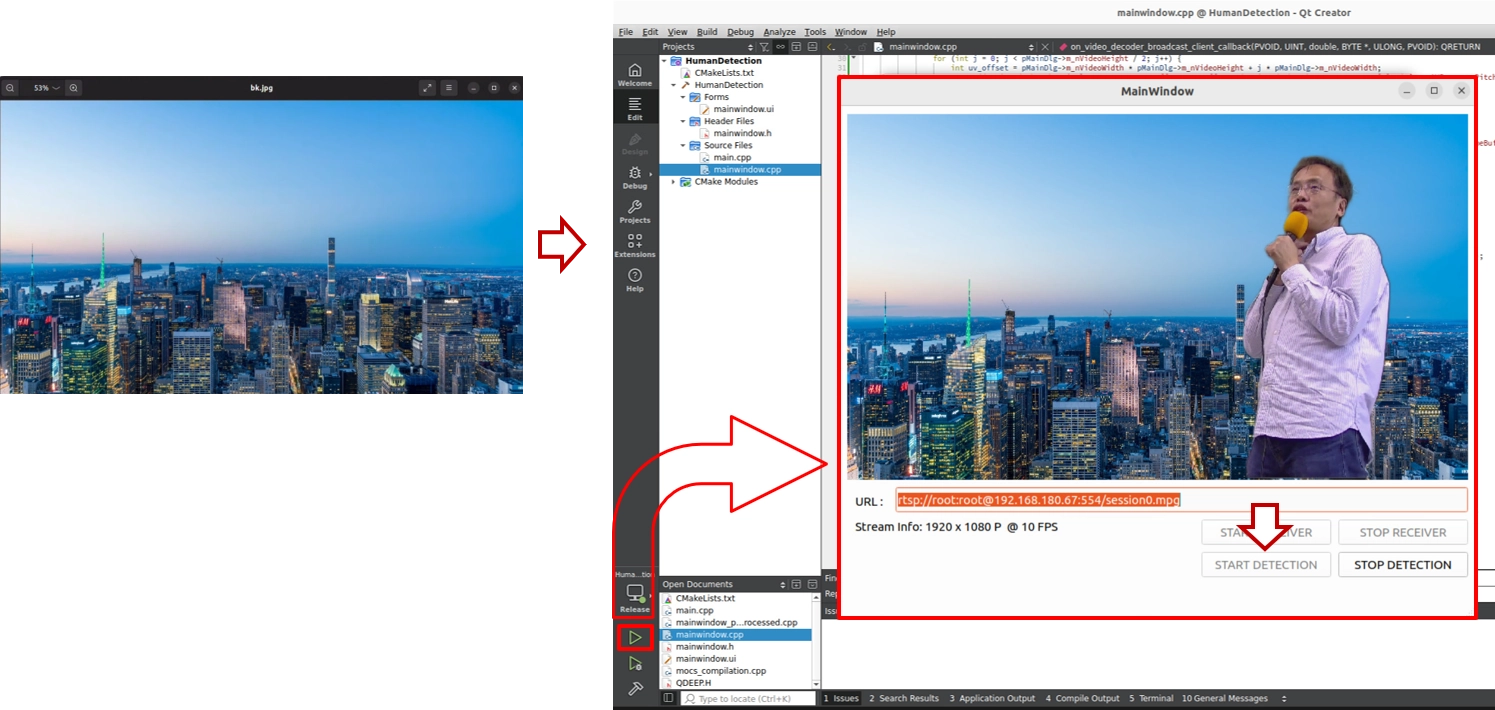
When you walk into the camera view, you will feel as if you are standing in a news studio or a Hollywood green-screen stage. The messy office that was originally behind you will completely disappear, replaced by the bk.jpg landscape image you just injected. The background removal around the edges will be extremely smooth and natural.