10-4 Face / Head / Body Detection Function Example Tutorial
In 10-3 Human Detection Function Example Tutorial, we successfully imported the "Human Detection" model into the project. In this chapter, we won't rewrite the code extensively. By simply replacing the model files, your software will instantly evolve, gaining the superpower to simultaneously recognize four different features: "Face, Head, Male Body, Female Body"!
Learning Objectives
Through this chapter, you will learn:
1. Experience the highly "modular" advantage of the QDEEP AI engine.
2. Master how to seamlessly switch AI models by modifying a single API parameter.
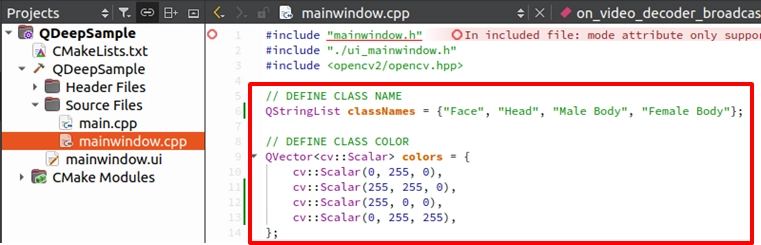
3. Expand the multi-class labels ( Class Names ) and exclusive colors ( Colors ) arrays to achieve rich multi-target visual marking.
Preparation
To give AI new recognition capabilities, we must "change its brain."
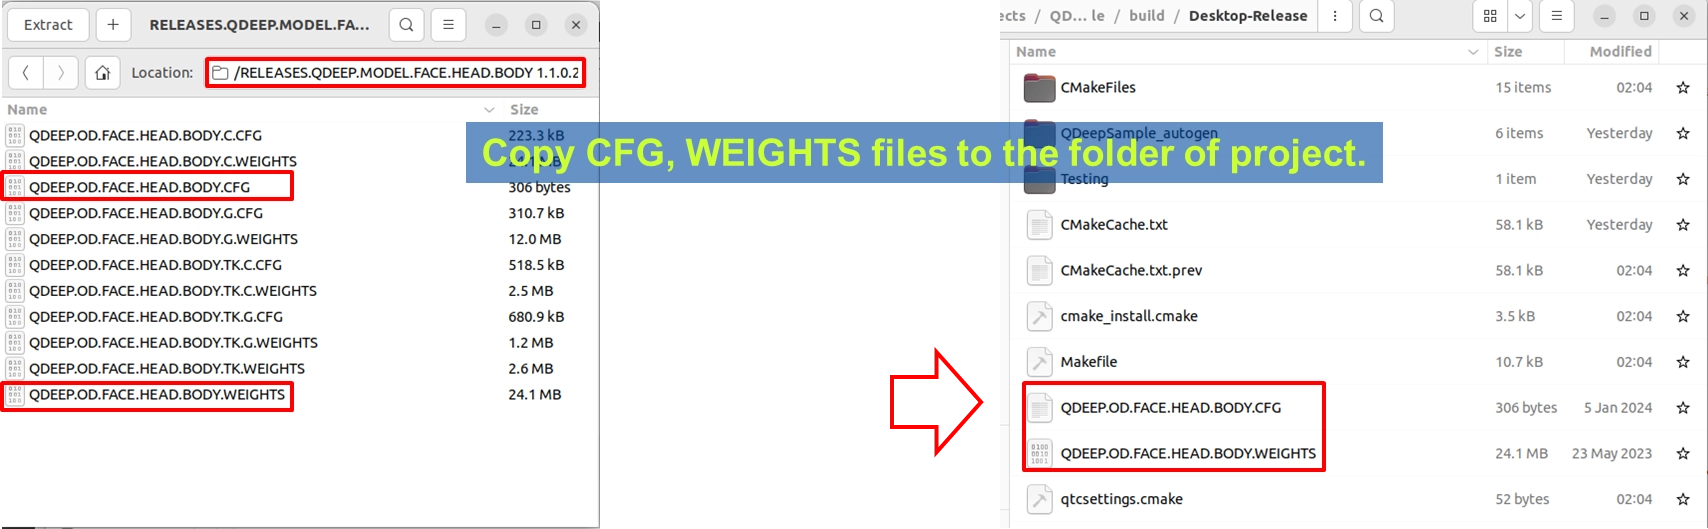
1. Please find the Face / Head / Body detection model compressed file provided by YUAN ( the file name may indicate FACE.HEAD.BODY related terms ).
2. After extraction, copy out QDEEP.OD.FACE.HEAD.BODY.CFG ( configuration file ) and QDEEP.OD.FACE.HEAD.BODY.WEIGHTS ( weight file ).
3. Paste these two files directly into the build output directory of your current Qt project ( at the same level as the executable file ).
How to Change Core APIs?
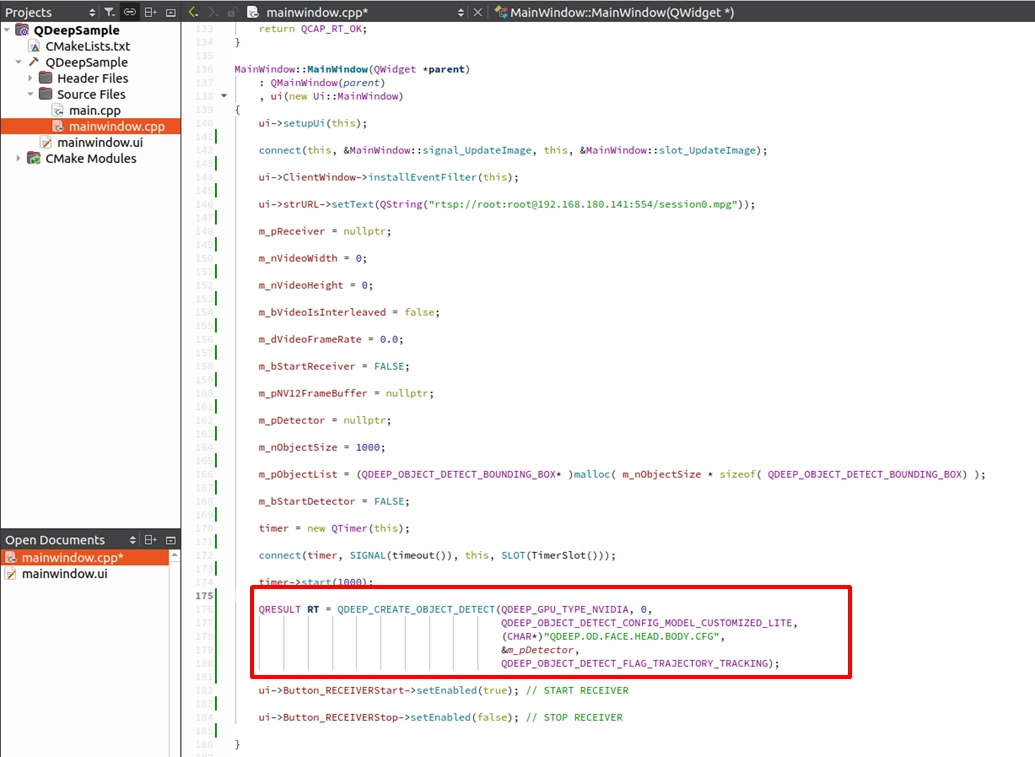
Recalling the previous chapter, we used five core APIs to control the object detection engine. The good news is that in this upgrade, you only need to modify the parameters of the QDEEP_CREATE_OBJECT_DETECT API!
QDEEP_CREATE_OBJECT_DETECT
This is the most critical API for creating the AI engine and loading the brain ( model ). The user must initialize the detector through this API.

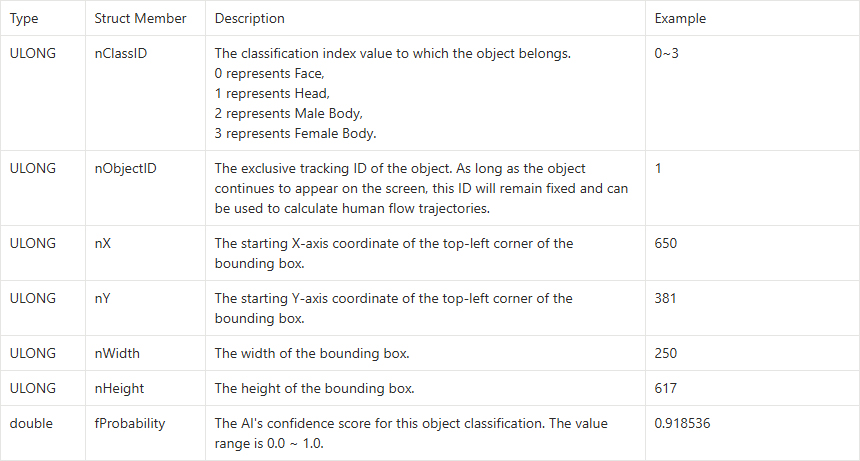
QDEEP_OBJECT_DETECT_BOUNDING_BOX Struct
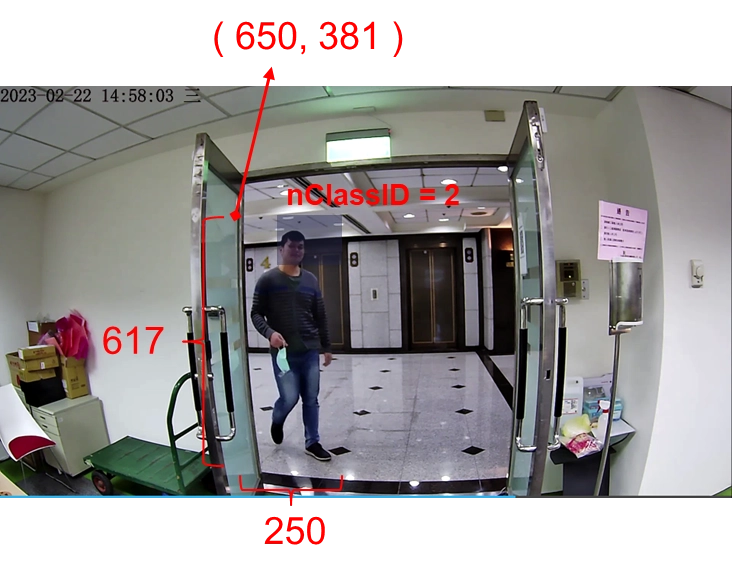
Although the API hasn't changed, because we swapped in an AI brain that can recognize more features, the data it returns to us has become richer! Please recall the QDEEP_OBJECT_DETECT_BOUNDING_BOX struct introduced in the previous chapter. When we feed in an image, the AI uses this struct to return the object's nClassID ( class index ). In the original human model, nClassID would always only return 0 ( representing Person ). But in this brand new model, nClassID will accurately define four different object types:
The API logic for the rest of START, STOP, feeding NV12 image (SET_BUFFER), and DESTROY requires absolutely no changes! This is the power of the SDK's unified interface design.
Writing Core Code
Please open the project we completed in 10-3, and follow these two simple steps to modify it:
Modifying the Model Loading Name

Expanding the Class Names and Color Arrays

Final Verification
It's that simple! We only changed less than 10 lines of code, and completed a massive upgrade of the AI system.
Now, please click "Build and RUN" in the bottom left corner to execute the project:
1. Enter the camera RTSP URL and click START RECEIVER to get the video feed.
2. Click START DETECTION to launch the multi-object AI analysis.
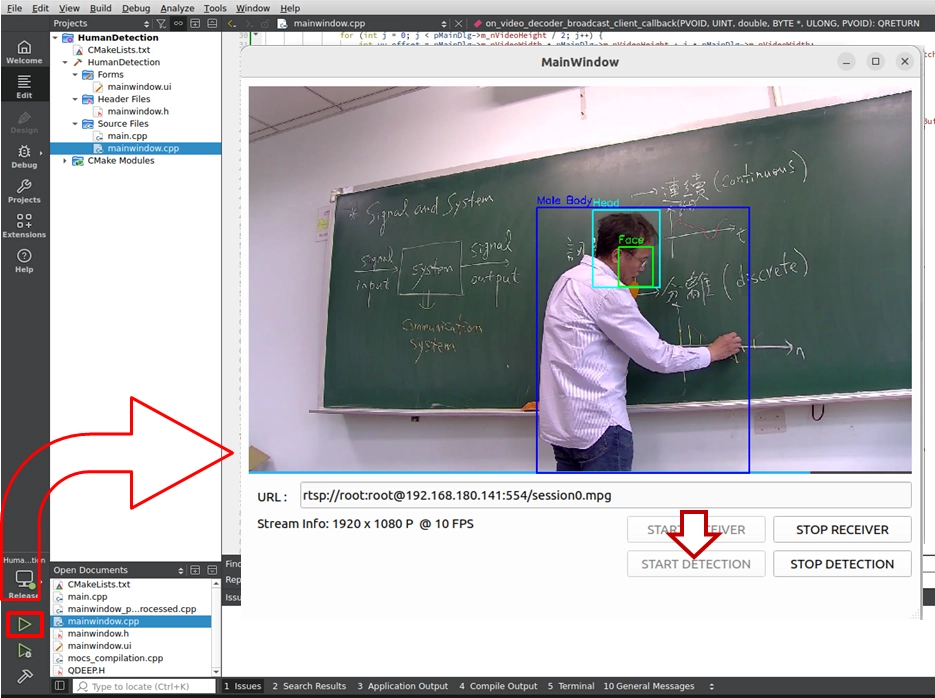
➤ Test Results: When a person enters the frame, you will see a very stunning visual effect:
• The AI will accurately draw a green box ( Face ) on the person's face.
• Draw a cyan box ( Head ) over the entire head area.
• And simultaneously determine body features, drawing a blue box ( Male Body ) or a yellow box ( Female Body )!
➤ Warm Reminder ( Very Important ): At the moment you open this software ( execute the program ) for the first time, the interface may take a moment to display. Please do not panic! This is because we wrote the logic for "loading the AI model" inside the program's constructor. The model must undergo initialization configuration during its first execution, at which point the system is working hard to load the massive neural network weight files into the GPU. As long as the software opens successfully ( first loading completed ), it means the AI brain is ready in the background! Subsequently, when you open the software again, you will no longer need this initialization waiting time! Through the practical exercises in these two chapters, you have thoroughly mastered the essence of "Object Detection" development with the QDEEP engine in the NexVDO SDK. In the future, no matter what kind of object recognition function it is, you know what to do—just change the model, modify the arrays, and you're all set!