5-2 Getting Started: Setup and Basic Use
Want Your Computer to "See"? A Super Easy Guide to Installing OpenCV!
This guide will show you the easiest way to install OpenCV—it's as simple as downloading an app! A heads-up: this method is perfect for getting started and having fun. If you ever need to process a massive amount of images or videos, you might need a more advanced setup down the road, but this approach is all you need for now!
Step 1: Open Your "Command Toolbox"—The Terminal
All the commands we're about to use will be entered in a program called the Terminal. Don't worry, it's not scary at all! Think of it as a small black window where you can talk directly to your computer.
How do you open it? On an Ubuntu system, you can press the Ctrl + Alt + T shortcut on your keyboard, or you can search for "Terminal" in your applications menu and click on it.

Pro Tip: Adjusting the Terminal Font Size!
If the text is too small to read or too big for your screen, no problem! Here are two super-handy shortcuts to easily change the font size:
1. Ctrl + Shift + +: Want to make the font bigger? Just hold down the Ctrl and Shift keys, then press the + key to make the text larger.
2. Ctrl + -: Need to shrink the text? Easy! Hold down the Ctrl key and press the - key to make it smaller.
Step 2: Give Your Computer a "Quick Update"!
Before we start the installation, just like you would update an app on your phone, we need to tell your computer system what the latest software is. This makes sure that the OpenCV we download is the "freshest" version!
sudo apt update: Imagine this is you asking a store, "What new stuff have you got in stock?" Your computer will go online and check for new software and updates.

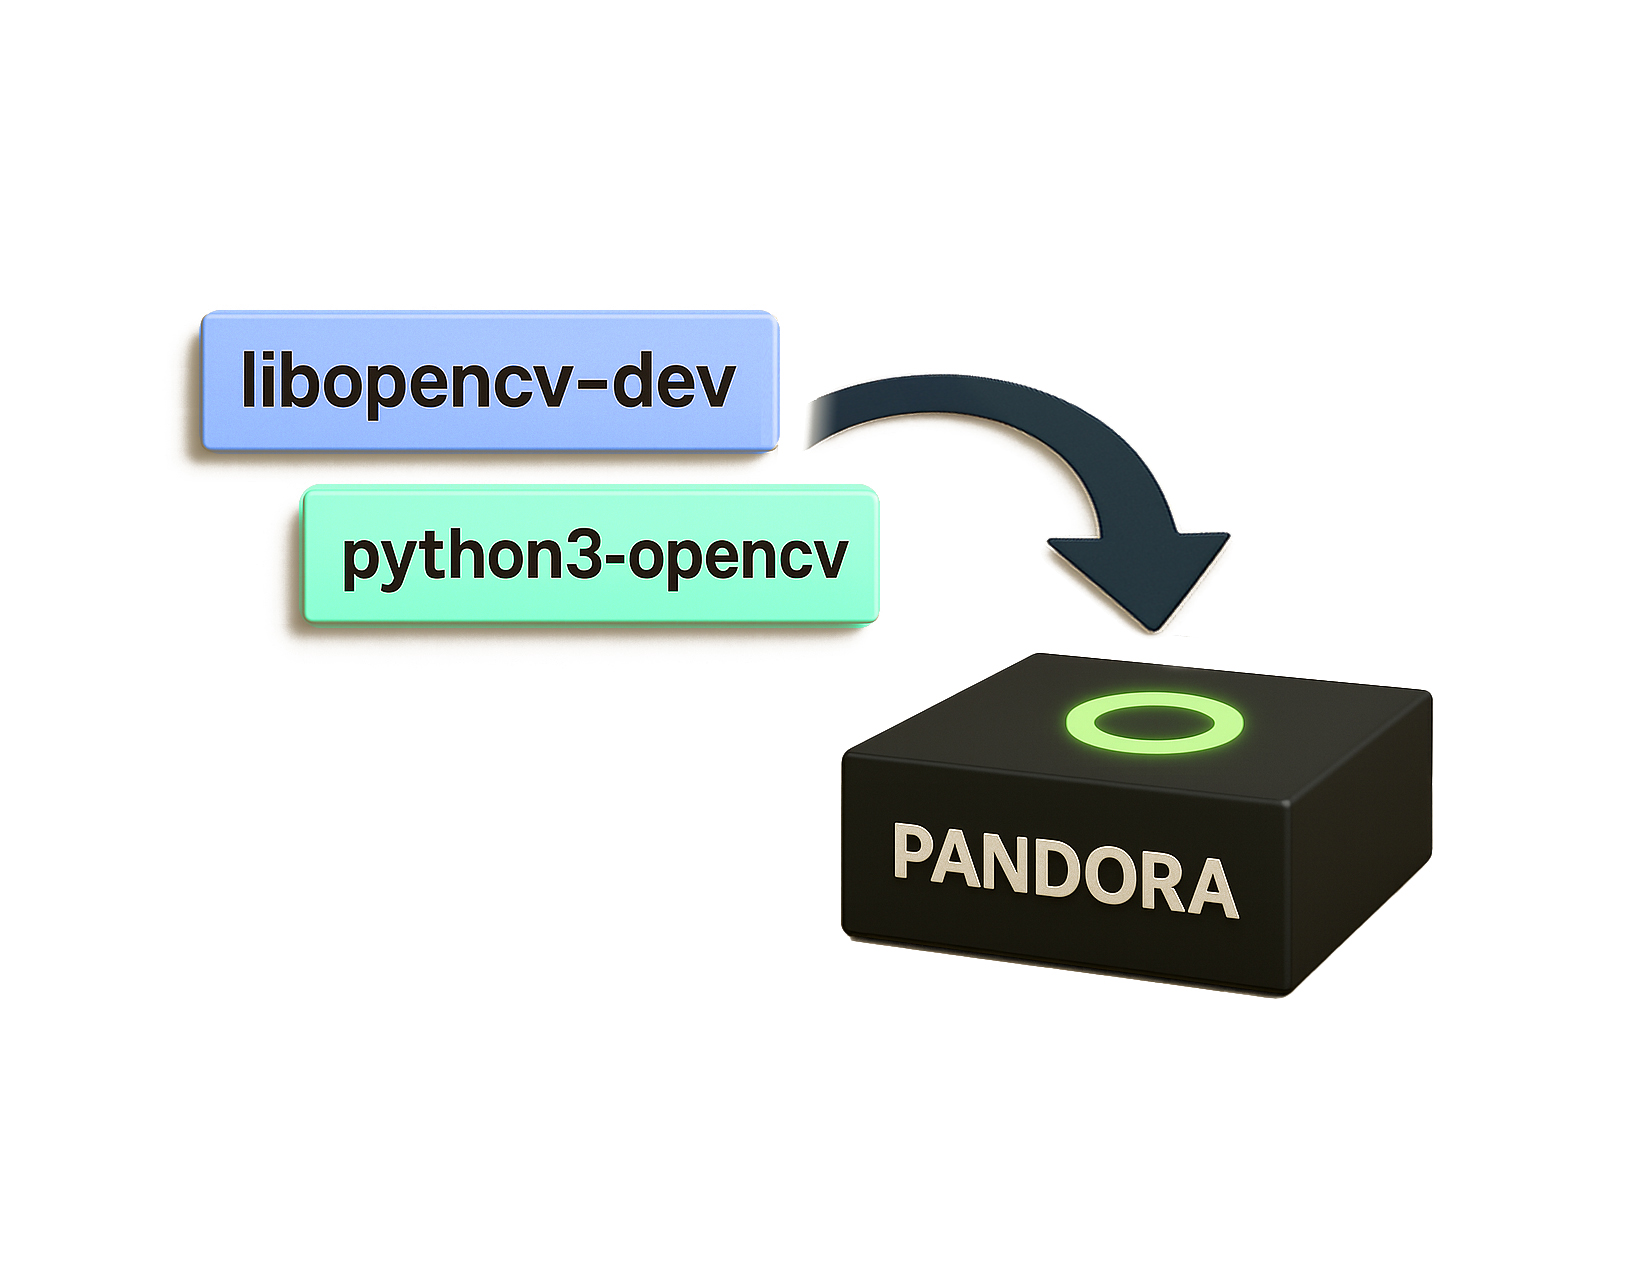
Step 3: Install the "Core Parts" of OpenCV
Next, we're going to install two important "parts" that are key to making OpenCV work on your computer!
1. sudo apt install -y: It's that "install for me and don't ask again" command!
2. libopencv-dev: This is the "brain" of OpenCV, containing all the code it needs to run.
3. python3-opencv: This is super important! It's the bridge that lets your Python programs hold hands and work with OpenCV. With this, you can use Python code to control OpenCV!
Step 4: Let's Check—Is OpenCV Installed?
After the installation is complete, we need to confirm that OpenCV has successfully "moved in" to your computer. A single line of simple Python code is all you need to find out!

1. Enter Python's "Secret Base" (The Interactive Interpreter): Open your Terminal (that black window where you type commands) and type python3. Hit Enter, and you'll see the prompt change to >>>. This means you've successfully entered Python's interactive mode—it's like walking into a room where you can talk directly to Python!
2. Have Python "Meet" OpenCV: After the >>>, type import cv2. This command is like telling Python, "Hey, I'm about to start using some of OpenCV's features!" If no error messages pop up, it means Python has successfully loaded OpenCV.
3. Confirm the OpenCV Version Number: Next, after the >>>, type print(cv2.__version__). This will display the version number of the OpenCV you just installed.
If you see a string of numbers like "4.5.4", then congratulations! OpenCV has successfully moved into your computer! You can now type exit() and hit Enter to leave Python's interactive mode.

Python First-Timers: Your Coding Adventure Starts Here!
Before we actually start using OpenCV to help computers "see" the world, you need a basic understanding of a super-cool programming language called Python—just like learning how to control your character before you start a video game! Don't worry, Python is incredibly easy to learn. It's like playing with LEGO bricks; you can use it to create all sorts of amazing things!
Variables: Your Code's "Treasure Chests"
In Python, variables are like "treasure chests" or "storage boxes" that you use to label your data. You put a piece of data inside, give it a name, and next time you need that data, you just call its name!

Here's how to use it:
x = 10 # Declare an integer variable
#(like putting the number 10 in a treasure chest named 'x')
name = "Coding Buddy" # Declare a string variable
#(putting the text "Coding Buddy" in a treasure chest named 'name')
pi = 3.14 # Declare a float variable
#(putting the decimal 3.14 in a treasure chest named 'pi')
print(x) # Let's see what's in the 'x' treasure chest!
print(name) # Let's see what's in the 'name' treasure chest!
print(pi) # Let's see what's in the 'pi' treasure chest!
When you run this code, you'll see:
Coding Buddy
3.14
Pretty cool, right? That's the magic of variables—they let your code handle all kinds of data with ease!
Comments: The "Secret Notes" for Your Code
Coding is a bit like writing a super-complex manual. Sometimes, you'll want to sneak in some "secret notes" just for yourself, to remember what a piece of code does or why you wrote it a certain way. In Python, these notes are called "comments"!
Comments are notes you write for yourself (or for anyone else who might read your code later). The computer ignores them completely, so you can write whatever you want without affecting how your code runs.

How do you write these "secret notes"?
In Python, you just add a # symbol in front of your note. Everything from the # to the end of that line becomes a comment.
# This is a comment. You can write anything you want to remind yourself!
x = 5 # This is also a comment, and it can go after a line of code.
Pro Tip: Getting into the habit of writing comments makes your code easier to understand. Even if you come back to it much later, you'll quickly remember what it does!
Data Types: Making Your Data "Fit the Job"
Imagine your computer is a giant warehouse full of information. This info isn't just thrown in randomly—each piece has its own special "category label." And that's exactly what data types are!
Data types determine what kind of items your variables (our "treasure chests" from before) can hold and what you can do with those items. Python is super smart—it's a "dynamically typed" language. This means you don't have to tell it beforehand whether your treasure chest will hold numbers or text. You just put the item in, and Python figures it out on its own! How convenient is that?

Python's Built-in Data Labels
In Python, you just add a # symbol in front of your note. Everything from the # to the end of that line becomes a comment.
1. Numeric Types: Everything to do with numbers!
(1) int (Integers):
These are the whole numbers we use every day, without any decimal points. Think of your age, the number of students in a classroom, and so on. They can be positive, negative, or zero.
age = 30
print(type(age)) # The computer will tell you this is
# (int means integer)
(2) float (Floating-Point Numbers):
These are numbers with a decimal point, like a product's price or someone's height and weight.
price = 19.99
print(type(price)) # The computer will tell you this is
# (float means floating-point number)
(3) complex (Complex Numbers):
You might not see this one as often. If you study complex numbers in math, you'll encounter it (it looks like 3+4j).
c = 3 + 4j
print(type(c)) # The computer will tell you this is
2. Boolean Type: The "Judgment Tool" that's either true or false!
bool (Booleans):
This data type has only two possible answers: True (meaning "yes" or "on") or False (meaning "no" or "off"). It's like a light switch, with only two states: on or off. This makes it perfect for all kinds of conditional checks (for example: Is the user a member? Is the user logged in?).
is_active = True # Let's say this person is active
print(type(is_active)) # The computer will tell you this is
3. Sequence Types: Data that's "lined up in order"!
(1) str (Strings):
These are just text! Anything enclosed in single quotes ('), double quotes ("), or triple quotes (''' or """) is a string. This includes your name, a sentence, or a website address. Once a string is created, you can't change its contents (we call this "immutable").
name = "Python Program" # Enclosed in double quotes
message = 'Hello World' # Enclosed in single quotes
multi_line = """
This is a
multi-line
string
""" # Using triple quotes for multiple lines
print(type(name)) # The computer will tell you this is
(2) list:
Think of this as a "treasure pouch". You can put a bunch of different items inside, and they stay in order! You can store numbers, text, decimals, or even other lists—anything goes! The best part is you can add, remove, or modify items whenever you want. It's super flexible (we call this "mutable"). Lists are enclosed in square brackets [].
my_list = [1, "Apple", 3.14, True] # You can put numbers, text, decimals,
# and booleans in one list!
print(type(my_list)) # The computer will tell you this is
my_list.append("Banana") # Wow! A banana has been added to our treasure pouch!
print(my_list) # The output will be [1, 'Apple', 3.14, True, 'Banana']
(3) tuple : This is also a "treasure pouch" where items are in order. But its biggest difference from a list is that once you put something inside, you can't modify, add, or remove anything (we call this "immutable"). It's like a "sealed treasure pouch"—what's inside is set forever. Tuples are enclosed in parentheses ().
my_tuple = (1, "Apple", 3.14)
print(type(my_tuple)) # The computer will tell you this is
# my_tuple.append("Banana") # If you try to modify it,
# Python will tell you "No!" It will show an error!
4. Set Types: Data that's "purified" to be unique!
(1) set :
Think of this as a "duplicate remover"! You can toss a bunch of items into it, and it automatically filters out the duplicates, leaving only unique items. The items also don't have any specific order. Sets are often used to check if an item exists or to perform operations like "union" and "intersection," just like in math. They're enclosed in curly braces {}.
my_set = {1, 2, 3, 2, 4} # There are two 2s here!
print(type(my_set)) # The computer will tell you this is
print(my_set) # The output will be {1, 2, 3, 4}. See, the duplicate 2 is gone!
(2) frozenset :
This is very similar to a set, but it's "immutable". Once a frozenset is created, you can't modify it.
my_set = {1, 2, 3, 2, 4} # There are two 2s here!
fs = frozenset(my_set) # Create a frozen set
print(type(fs)) # The output will be
print(fs) # The output will be {1, 2, 3, 4}. See, the duplicate 2 is gone!
# Error demonstration: Attempting to modify the content
try:
fs.add(10) # frozenset does not have add() or remove() methods
except AttributeError as e:
print(f"Expected error: {e}")
5. Mapping Type: Data that comes with a "name tag"!
Dictionaries:
Think of this as a "smart phonebook"! It doesn't store data in a specific order. Instead, it uses a combination of "keys" and "values". Each "key" is like a "name tag"—it has to be unique. If you know the name tag, you can find its corresponding "value" (just like knowing a name lets you find a phone number). Dictionaries are enclosed in curly braces {} and use a colon : to separate keys from values.
my_dict = {"name": "Coding Buddy", "age": 30, "city": "Taipei"}
# Keys are strings, and values can be any type
print(type(my_dict)) # The computer will tell you this is
print(my_dict["name"]) # Want to know what the value for "name" is?
# Just use the key to find it! The output will be Coding Buddy
my_dict["age"] = 31 # Wow! The "Coding Buddy"'s age has been updated!
# Dictionaries can change values!
print(my_dict) # The output will be
# {'name': 'Coding Buddy', 'age': 31, 'city': 'Taipei'}
Do you have a clearer understanding of Python's different data types now? These different "data labels" will help you manage the information in your code more effectively!
Functions: The "All-Purpose Toolbox" for Your Code
Imagine you often have to do the same thing over and over, like "making coffee" or "cleaning your room." It's a hassle to do it step-by-step from the beginning every time, right? What if you had an "all-purpose toolbox" that could package these repetitive steps?
Next time, you just call out this toolbox, and it automatically gets the job done—that's a huge time-saver! In coding, a **Function** is exactly this "all-purpose toolbox"! It's a block of code you write beforehand to perform a specific task. When you need that task done, you just "call" the function, and it automatically handles everything for you. How convenient is that?

How do you build your "all-purpose toolbox"?
In Python, we use the special "secret code" def to define a function—that's how we build our "all-purpose toolbox."
def greet(name):
"""This function greets the specified name"""
# This is a description of what the toolbox does. It's optional but recommended.
return f"Hello, {name}!"
# The function will return a result after it's done.
# Now, let's use our "greet" toolbox!
message = greet("John") # We call the greet toolbox and tell it to greet "John"
print(message) # Let's print the result the toolbox returns!
1. def greet(name):
(1) def is the "secret code" to define a function.
(2) greet is the name of your "all-purpose toolbox," and you can name it anything you want.
(3) (name) is the "input slot" for the toolbox. When you use this toolbox, you can pass some data through this slot (here, we pass in a name).
(4) : Don't forget this colon! It tells Python that the code for the function starts on the next line.
2. """This function greets the specified name""": The part enclosed in triple quotes is called a Docstring. It's not code; it's a description of what the function does. Think of it as a manual on the toolbox, which is super helpful for others—and for your future self!
3. return f"Hello,{name}!":
(1) return means the function will "return" a result to you after it completes its task.
(2) f"Hello, {name}!" is a convenient way to format a string. It automatically puts the value of the name variable into the string. So if name is "John", this becomes "Hello, John!"
When you run the code above, you'll see the output:
Hello, John!
See? We only defined the greet function once. Now, no matter who we want to greet, we just call it and pass in a different name, and it gets the job done automatically! How incredibly convenient is that?
Conditional Statements: Your Code's "Choose Your Own Adventure"
In our daily lives, we often have to make choices based on different situations, right? For example: "If" tomorrow is a holiday, we'll go shopping; "otherwise,"we'll go to school. In code, we have a similar "if... then..." decision-making system. This is called a conditional statement!
Conditional statements make your code act like a smart assistant. It decides which block of code to run based on the "condition" you provide. Think of it as writing a multiple-choice quiz for your program!

How to Write Your Code's "Multiple-Choice Quiz"? In Python, we mainly use three keywords—if, elif (short for "else if"), and else—to create conditional statements.
age = 20 # Let's say this person's age is 20
if age >= 18:
print("You are an adult.")
# If the age is 18 or older, print this line
else:
print("You are not yet an adult.")
# If the above condition is not met (i.e., age is less than 18), print this line
(1)if (If...):
if is the start of a conditional statement. It's followed by a "condition" (like age >= 18, which means "age is greater than or equal to 18"). If this condition is True, the code below if (don't forget to indent!) will be executed.
(2) else (Otherwise...):
else is the "backup" option for when the if condition is not met. If the if condition is False, the program will skip the code below if and execute the code below else instead.
When you run the code above, because age is 20, which meets the age >= 18 condition, you will see the output:
You are an adult.
Multiple Choices: Enter elif!
What if you have more than two choices? For example: "If the test score is greater than 90, you get a reward; if the score is between 60 and 90, you get encouragement; otherwise, you get tutoring." In this case, elif is what you need!
score = 75 # Let's say the test score is 75
if score >= 90:
print("Awesome! Here's a reward!")
elif score >= 60: # The shortened version of "else if."
# It means "if the above condition isn't met, but this one is..."
print("Good job! Here's some encouragement!")
else:
print("Don't give up! We'll give you some tutoring.")
This code checks the conditions in order:
1. It first checks score >= 90.
2. If that's not true, it moves on to elif score >= 60.
3. If that's also not true, it will finally run the else block.
Since the score is 75, it doesn't meet the first condition but it does meet the second one, so the output will be:
Good job! Here's some encouragement!
Do you have a clearer understanding of how code makes "choices" now? Conditional statements are a super important part of programming. They make your code smarter and more flexible!
Loops: Your Code's "Repeat Machine"
Have you ever had to do the same thing over and over again? For example, taking apples out of a box one by one or jumping rope 100 times in a row? If you had to do it manually every time, you'd be exhausted!
In programming, when we need to run a block of code multiple times, we use "Loops"! A loop is like a "repeat machine" that lets your computer automatically and efficiently complete those repetitive, boring tasks. It's incredibly convenient!

1. The for loop: The "Roll Call" Repeat Machine! The for loop excels at tasks where you need to "take out a bunch of items and handle them one by one." Imagine you have a basket of fruit (or a string of text, or a list of numbers), and you want to take out each fruit to inspect it. The for loop helps you handle each item, one by one, like a "roll call"!
fruits = ["apple", "banana", "cherry"] # This is a list of fruits
for fruit in fruits:
print(fruit) # Print the name of each fruit
for fruit in fruits::
(1) for:
for is the "secret code" for a for loop.
(2) fruit:
fruit is a temporary "representative" variable. Each time the loop runs, it will represent one fruit from the fruits list, in order.
(3) in fruits:
in fruits tells Python that we want to take items out of the fruits list, one by one.
(4) :
: Don't forget the colon! The indented code that follows is what the loop will do repeatedly.
When you run this code, you'll see:
apple
banana
cherry
See? The for loop cleverly printed every fruit from the list!
2. The while loop: The Repeat Machine That Stops Only When a Condition is False!
The while loop is like a "non-stop" repeat machine. As long as the "condition" you set is True, it will keep running the code inside the loop. It only stops when the condition becomes False.
Imagine you want to jump rope. As long as you haven't jumped 100 times, you'll keep jumping.
count = 0 # Set a counter that starts at 0
while count < 5: # As long as count is less than 5, keep running the loop!
print(f"Count: {count}") # Print the current count
count += 1 # Add 1 to the counter after each jump
# (this is important, or you'll have an infinite loop!)
while count < 5::
(1)while is the "secret code" for a while loop.
(2) count < 5 is the "condition." As long as the value of count is less than 5, the code inside the while loop will keep running.
(3) count += 1 This line is super important! It makes the value of count increase after each loop. Without this line, count would always be 0, the 0 < 5 condition would always be true, and your program would get stuck in an "infinite loop"!
When you run this code, you'll see the output:
Count:0
Count:1
…
Count:4
When count becomes 5, the count < 5 condition is no longer true, so the loop stops.
Do you have a clearer understanding of these two "repeat machines"—the for loop and the while loop? Learning to use loops will massively boost your code's efficiency, making repetitive tasks a piece of cake!
import and as: Borrowing Your Code's "Superpowers"
Imagine your code is like you building a LEGO model. Some LEGO bricks you have on hand, but some special ones (like light-up bricks or spinning motors) you don't. They're stored in a "toolbox" called a Module or a Package.
That's where import comes in! It's like borrowing that toolbox from a friend. It lets you "borrow" all the code functions inside that toolbox so you can use those "superpowers" in your own code!
Why use as? To give your toolbox a "nickname"!
Sometimes the name of the toolbox you borrowed can be very long. It's a hassle to type out the long name every time you want to use a function from it, right? That's where the keyword as comes in!
The purpose of as is to give your borrowed "toolbox" a "nickname" (or "alias"). This way, you can use a shorter, more convenient name to access the functions inside the toolbox!
For example, "MagicToolbox" might be a long name, but if you give it the nickname "mt," you only have to type "mt" from now on. Isn't that a lot easier?

Let's see how to "borrow" and "give a nickname"!
Here's a practical example of how it works:
# Imagine we're borrowing from the "math toolbox" and giving it the nickname "m"
import math as m
# Now, we can use this nickname "m" to call functions inside the math toolbox!
# m.pi is the value of pi from the math toolbox
print(m.pi)
# m.sqrt(25) is the square root function from the math toolbox,
# which calculates the square root of 25
print(m.sqrt(25))
When you run this code, you will see:
3.141592653589793
5.0
You might also see this kind of code in other people's projects:
# This is "pandas," a super-popular toolbox for data analysis in Python.
# It's a huge one!
# Everyone usually gives it a super common nickname: "pd"
import pandas as pd
# This way, you only have to type pd.XXX to use its functions,
# instead of the long pandas.XXX
df = pd.DataFrame({'A': [1, 2], 'B': [3, 4]})
print(df)
Does this make the concepts of import and as clearer for you? By learning this, you can easily use all kinds of powerful "toolboxes" and give your code even more incredible "superpowers"!
NumPy: Python's "Super Brain" for Numbers
Have you ever played a game that involves handling a huge amount of numbers? Like calculating scores, ranking players, or analyzing data? When there are tons of numbers, it's a huge hassle to do it manually, right? That's when your code needs a "super brain" to help!
In the world of Python, NumPy (Numerical Python) is that incredible "number-crunching brain"! It's a powerful toolbox specifically designed to handle large amounts of numbers, especially data arranged in rows, columns, or even multiple layers (which we call multi-dimensional arrays and matrices).
When OpenCV processes images, it actually uses a lot of NumPy's techniques. That's because an image is just a "giant table" of numbers. So, by learning NumPy, you'll gain a deeper understanding of how OpenCV "sees" the world!
What Makes NumPy So Powerful?
1. ndarray Object: The Super-Fast "Data Table"! NumPy's core secret weapon is the ndarray (n-dimensional array) object. You can think of it as a "super-fast, super-efficient table" for storing numbers. It's much faster at handling numbers than Python's built-in list. This speed advantage becomes very clear when you're working with large amounts of data!
2. Vectorized Operations: Get a Whole Row of Calculations Done at Once! Normally, when we handle numbers, we might have to process them one by one. But the cool thing about NumPy is that it can perform arithmetic (like addition, subtraction, multiplication, and division) directly on an entire table! Imagine you want to multiply every number in a table by 2. You don't have to do it one number at a time. NumPy can instantly perform the calculation on the entire table. This is called a "vectorized operation," and it's incredibly efficient!
3. A Wealth of Mathematical Functions! NumPy doesn't just do basic math; it also has a ton of built-in math functions. From statistical calculations like the mean and max to more complex matrix operations, it can do almost anything!

NumPy's Basic Usage: Let's Play Around!
To use NumPy's superpowers, we first have to "borrow" it, and we usually give it a super common "nickname"—np!
import numpy as np # Import the NumPy super brain and give it the nickname "np"

# Create a 1D array (imagine a single row of numbers)
arr1 = np.array([1, 2, 3, 4, 5])
print("1D array:", arr1)
print("Array type:", type(arr1))
# The computer will tell you this is
print("Array shape:", arr1.shape)
# (5,) means this table has 5 slots and is 1-dimensional

# Create a 2D array (imagine a table with two rows and three columns, a.k.a. a matrix)
arr2 = np.array([[1, 2, 3], [4, 5, 6]])
print("\n2D array:\n", arr2)
# \n is a new line, to make the output neater
print("Array shape:", arr2.shape)
# (2, 3) means this table has 2 rows and 3 columns

# Array operations (Super-powerful vectorized operations!)
arr_a = np.array([1, 2, 3])
arr_b = np.array([4, 5, 6])

print("\nArray addition:", arr_a + arr_b)
# Adds the numbers at the same position in both tables!
print("Array multiplication:", arr_a * 2)
# Multiplies every number in the table by 2!
print("Element-wise multiplication:", arr_a * arr_b)
# Multiplies the numbers at the same position in both tables!

# Common functions
print("\nMean:", np.mean(arr1))
print("Max value:", np.max(arr1))
print("Min value:", np.min(arr1))
When you run this code, you'll see how convenient and fast NumPy is at handling numbers!
Object-Oriented Programming (OOP): Building Your Own "Code LEGO" Kingdom!
Ever played with LEGO bricks? Each brick is an independent part with its own shape, color, and specific function (like connecting to others or rotating). You can combine these bricks to build all sorts of things, from houses to cars to robots!
In coding, Object-Oriented Programming (OOP) is this "brick-building" design approach! It organizes your code into independent "objects," and each object is like a LEGO brick, with its own "data" (like the brick's color and size) and "methods" for handling that data (like the brick's connecting or rotating function).
The great thing about OOP is that it makes your code more organized and easier to manage. Plus, you can reuse these "bricks" without having to build everything from scratch every time!
OOP's Five Superpowers!
OOP has five core concepts, which are like the five "superpowers" of the LEGO brick kingdom:
1. Class: The "Blueprint" for Objects!
A class is like the "blueprint" or "mold" for making LEGO bricks. It defines the common traits (data) and abilities (methods) that all bricks of the same type will have. For example, a "blueprint" for an "Animal" class might define that animals have a name, an age, and the ability to bark and run.

2. Object: The "Actual Brick" Made from the Blueprint!
An object is the "actual brick" created from a class "blueprint." You can use the same "Animal" blueprint to make a "dog" object and a "cat" object. Each animal (each object) has its own name and age, but they all share the abilities defined by the "Animal" blueprint.

3. Encapsulation: "Packaging" Data and Functions!
Encapsulation is like "packaging up" the complex internal structure of a LEGO brick. You only need to know how to use the brick (through its "methods"), not how it works inside. It "bundles" data (attributes) and the methods that operate on that data into a single, independent unit. This makes your code less likely to be accidentally broken and more secure.

4. Inheritance: Copying a "Base Brick" and Upgrading It!
Inheritance is like copying the blueprint of a "base brick" and then adding new features or modifying details to create an "upgraded brick." For example, you can have a "Dog" class inherit all the traits and abilities of the "Animal" class, and then add the unique skill of "getting its breed." This saves you from having to redefine all of a dog's basic attributes!

5. Polymorphism: A Brick with "Multiple Uses"!
Polymorphism means that different kinds of objects can respond differently to the same "command" (a method call). Imagine you have a "make sound" command. If you give the command to a "Dog" (which inherits from "Animal"), it will "woof." But if you give the command to a "Cat" (also inheriting from "Animal"), it might "meow." Even though the command is the same, the response is different because they are animals from different blueprints. In Python, this is usually done through "method overriding" (where a subclass redefines a method from its parent class).

OOP Example: Build Your Code Pets!
Let's use some code to see these concepts in action:
# --- Class and Object ---
class Animal:
    def __init__(self, name, species):
        # --- Encapsulation ---
        self.__name = name
        self.__species = species
        print(f"Created a {self.__species} object: {self.__name}")

    def get_name(self):
        return self.__name

    def get_species(self):
        return self.__species

    def display_info(self):
        print(f"My name is {self.get_name()}, and I am a {self.get_species()}.")

    def make_sound(self):
        print(f"{self.get_name()} makes a generic sound.")

    def eat(self):
        print(f"{self.get_name()} is eating.")

# --- Inheritance ---
class Dog(Animal):
    def __init__(self, name, breed):
        super().__init__(name, "dog")
        self.__breed = breed
        print(f"{self.get_name()} is a {self.__breed}.")

    # --- Polymorphism - Method Overriding ---
    def make_sound(self):
        print(f"{self.get_name()} barks!")

# --- Program Execution Area ---
if __name__ == "__main__":
    dog1 = Dog("Lucky", "Golden Retriever")
    dog1.make_sound()
    dog1.eat()
When you run the code above, you'll see how your "code pets" show off their unique traits and abilities!
Do you have a clearer idea now about Object-Oriented Programming and how to build your own "code brick" kingdom? OOP is a very powerful tool that makes your code more flexible and easier to maintain!
Advanced Challenge
1. Unlock the True Potential of OpenCV: Compiling from Source
Have you already tried the standard way of installing OpenCV? While it gets you started quickly, you might discover it doesn't fully unleash the powerful performance of Pandora! If you're not satisfied with the status quo and want to squeeze every last drop of performance out of OpenCV, for example:
(1) Fully enable CUDA acceleration to make your image processing lightning fast!
(2) Seamlessly integrate GStreamer support to build powerful multimedia applications!
(3) Tailor exclusive hardware optimizations for your Pandora to maximize your device's potential! If so, it's time to accept the challenge! Compiling from source is not just the "best choice" to achieve these goals; it's a necessary path to truly mastering OpenCV. This process will require some time and patience, but every successful compilation will be proof of your growing technical skills!
2. Build Your Exclusive "Smart Library" Management System!
You've already learned the basics of Python, including variables, data types, functions, conditional statements, loops, and you've even been introduced to NumPy and Object-Oriented Programming. Now, it's time to put all that knowledge together to build a practical project!
Challenge Goal: Create a Simple Library Management System
Your mission is to design a "Smart Library" management system that allows users to perform the following functions:
(1) Add a book : Users can enter the book's title, author, and publication year.
(2) Search for a book : Users can search for a book by title, author, or keyword.
(3) Display all books : List all the books currently in the library with their information.
(4) Borrow a book : Mark a book's status as "borrowed."
(5) Return a book : Mark a book's status as "available."
(6) Remove a book : Delete a specific book from the library.
Challenge Requirements:
(1) Object-Oriented Programming (OOP)
- Create a Book class:
This class should have attributes (variables) to store the book's title, author, publication_year, and is_borrowed (a Boolean, with a default of False).
Add methods (functions) to the Book class, such as borrow() and return_book(), to change the is_borrowed status.
- Create a Library class:
This class should have an attribute to store a list of all Book objects.
Add methods (functions) to the Library class to implement all the functions from the challenge goal above (add, search, display, borrow, return, remove books).
(2) User Interface:
- Use a loop to create a main menu that allows users to repeatedly select different functions (e.g., "1. Add a Book," "2. Search for a Book," etc.).
- Use conditional statements (if/elif/else) to execute the corresponding function based on the user's choice.
- Use the input() function to prompt the user for information.
- Make sure the output is clear and easy to read when displaying results.
(3) Data Management:
You can consider using NumPy to handle the list of books (while Python's built-in list is sufficient for beginners, you can try integrating a NumPy array to manage book data as an extra challenge).
(4) Code Readability:
- Be sure to use comments to explain your code, especially in complex parts, to help yourself and future readers understand your design logic.
- Keep your code neatly formatted and use meaningful variable and function names.
(5) Error Handling (Advanced):
Consider how to handle cases where the user inputs an error (e.g., enters an invalid menu option or tries to borrow a book that doesn't exist).
Example Workflow:
Welcome to the Smart Library Management System! Please select an operation:
- Add a Book
- Search for a Book
- Display All Books
- Borrow a Book
- Return a Book
- Remove a Book
- Exit
Please enter your option (1-7): 1 Please enter the title: Python Beginner's Guide Please enter the author: John Please enter the publication year: 2023 Book has been added! Please select an operation:
- Add a Book ...
- Display All Books ...
Please enter your option (1-7): 3 Books currently in the library: Title: Python Beginner's Guide, Author: John, Publication Year: 2023, Status: Available Please select an operation: ... Please enter your option (1-7): 7 Thank you for using the system. Goodbye!
This challenge will not only help you review what you've learned but, more importantly, it will guide you to think about how to combine different coding concepts into a useful application. You'll experience the joy of programming and build a solid foundation for more complex projects in the future!