10-11 Hand Keypoint Detection Sample Tutorial
In the previous chapter, [10-10], we pulled the camera farther back and used the human skeleton keypoint model to capture the full-body skeleton, laying the foundation for “behavior analysis.” But what if we want to develop a “sign language translator,” a “contactless elevator button (virtual mouse),” or a “rock-paper-scissors game”? In those cases, the precision of a full-body skeleton is not enough.
In this chapter, we will “zoom in” and focus on the most precise and flexible parts of the human body: the hands. We will introduce the hand keypoint model, which can accurately capture 21 keypoints on each hand, including the wrist and the joints of all five fingers. Best of all, thanks to the solid OpenCV drawing architecture we built in the previous chapter, you will find that this upgrade is almost effortless.
Learning Objectives
Through this chapter, you will learn:
1. Viewpoint and model switching: Move from full-body tracking (17 points) into the microscopic world of hand tracking (21 points).
2. Building a hand connection dictionary: Understand the official index definitions of the 21 keypoints, including the topology of the wrist and five fingers.
3. Architecture reuse: Reuse the “draw lines first, then points” and “defensive filtering” S.O.P from 10-10, and experience the development efficiency brought by Clean Code.
Preparation
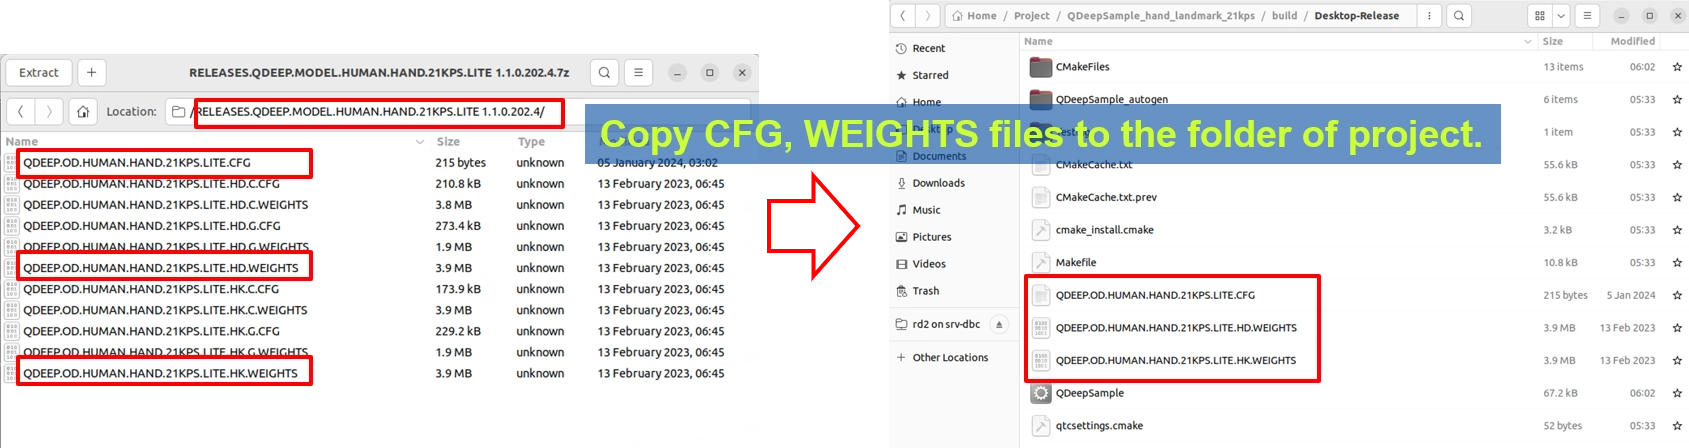
This model package is slightly different from previous ones because it combines multiple recognition weight files, so there will be more files. Please locate the Human Hand 21KPS model archive. Its filename may include wording such as HUMAN.HAND.21KPS. After extracting it, copy QDEEP.OD.HUMAN.HAND.21KPS.LITE.CFG (the configuration file) and all corresponding weight files into the build output directory of your Qt project.
How Should the Core API Be Changed?
The API logic this time is exactly the same as in 10-10. The system will still place the captured points into the sKeypoints array. The only thing we need to do is modify the parameter used when creating the detector:
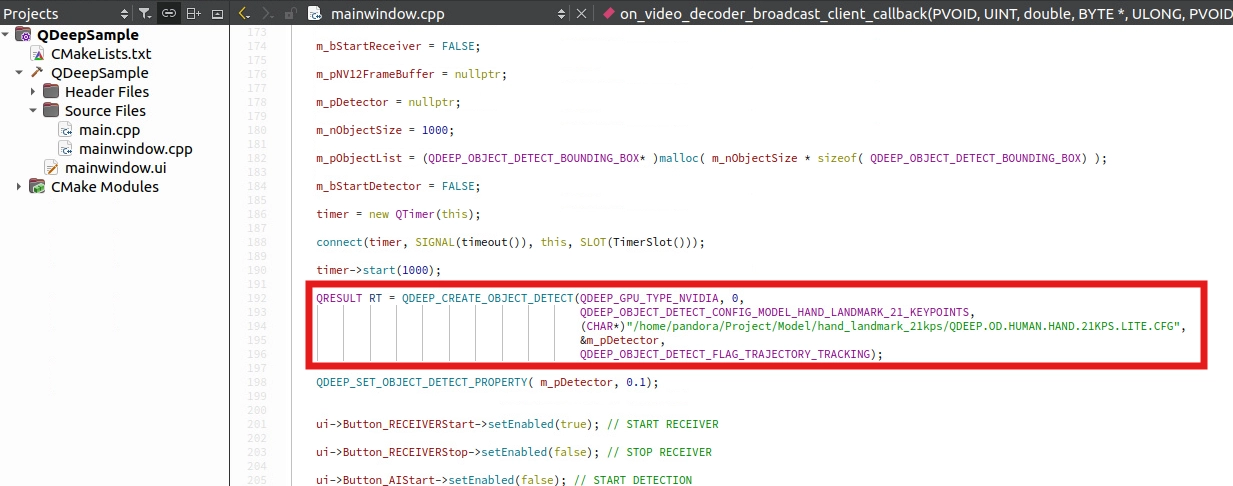
• Change of model configuration type: In QDEEP_CREATE_OBJECT_DETECT, change the Enum to the hand-specific QDEEP_OBJECT_DETECT_CONFIG_MODEL_HAND_LANDMARK_21_KEYPOINTS.
• Core difference (17KPS vs 21KPS): In the full-body model from 10-10, “one person” in a frame generates one array containing 17 points. However, in the hand model from 10-11, the AI works at the unit of a “hand.” Each hand in the frame, whether left or right, independently generates one sKeypoints array containing 21 points.
QDEEP_CREATE_OBJECT_DETECT
This is the most critical API for creating the AI engine and loading the “brain” (model). Users must initialize the detector through this API.

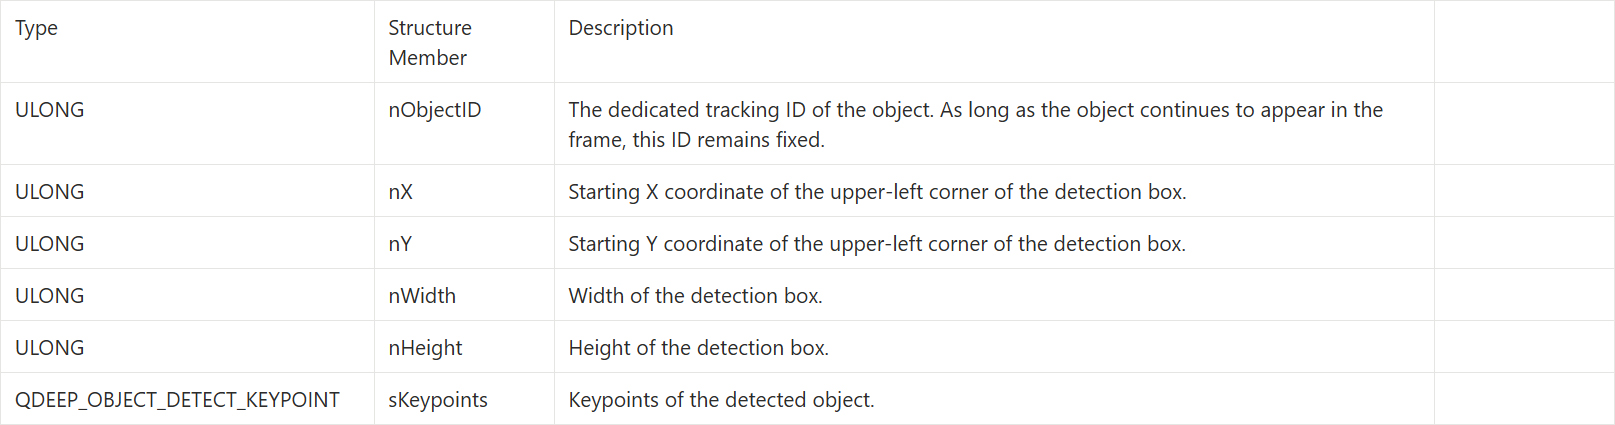
QDEEP_OBJECT_DETECT_BOUNDING_BOX Structure
After switching to the hand skeleton keypoint model, the sKeypoints returned by the AI engine through QDEEP_OBJECT_DETECT_BOUNDING_BOX will have a brand-new physical meaning.
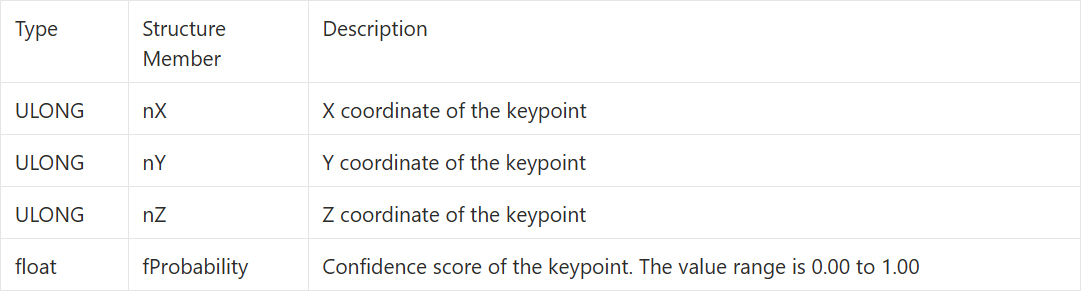
QDEEP_OBJECT_DETECT_KEYPOINT Structure
Inside QDEEP_OBJECT_DETECT_BOUNDING_BOX, an array named sKeypoints[ QDEEP_MAX_KEYPOINY_SIZE ] is unlocked. Each element in this array is a structure specifically used to describe a single “feature point”: QDEEP_OBJECT_DETECT_KEYPOINT.
It contains four highly valuable parameters, defined in detail below :
Writing the Core Code
Open your project, and let's make the core code changes.
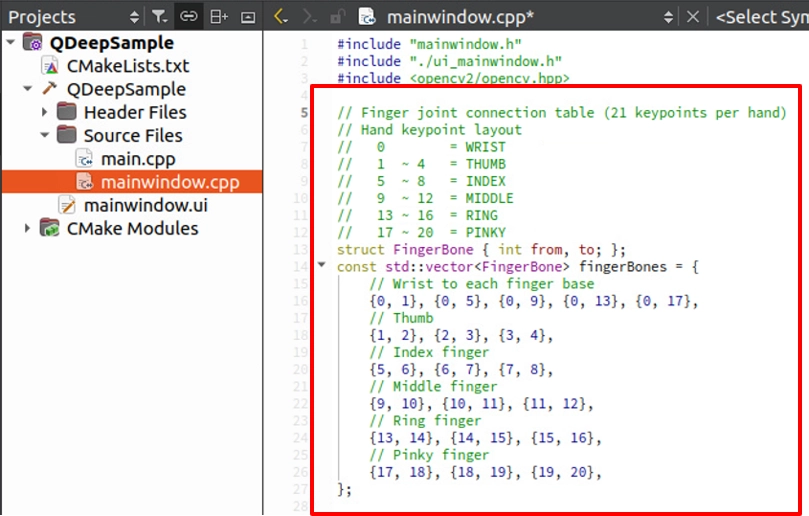
Define the 21-Point Hand Skeleton Connection Dictionary
The 21 points of the hand are not arranged randomly. They follow a very strict logic: point 0 is the wrist, and every 4 points after that represent one finger. At the top of mainwindow.cpp, replace the full-body bones from the previous chapter with the following finger connection dictionary.
Modify Model Loading
In the constructor, apply the new hand model settings. This time, we do not need to identify people, so dwFlags can be set to trajectory tracking only.
OpenCV Drawing S.O.P
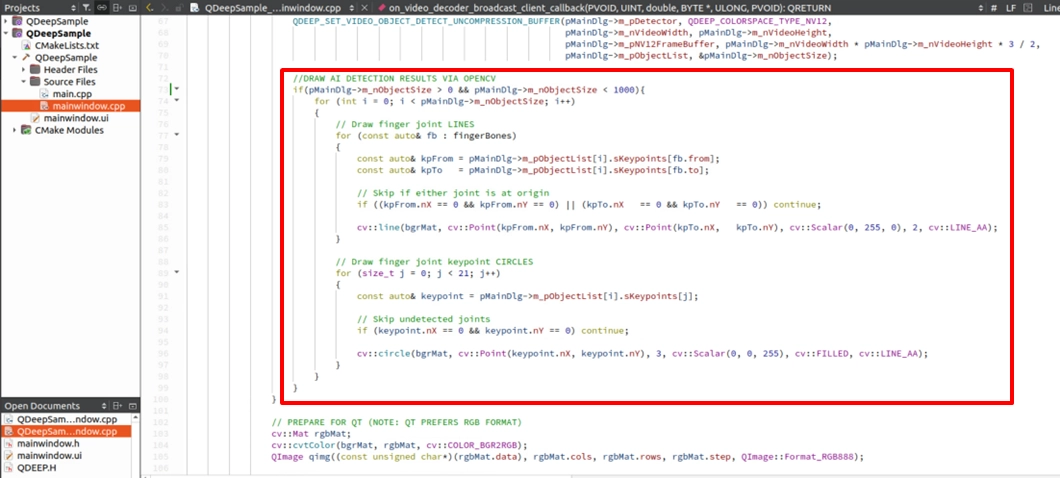
After we successfully obtain the structure returned by the AI, the next step is to use OpenCV to overlay the hand skeleton onto the image. Developers should draw in the following order:
1. Obtain the 21 keypoints: Extract the 21 sKeypoints array dedicated to that hand from m_pObjectList.
2. Draw the finger bone connections: Use the fingerBones dictionary we defined to draw lines between connected finger joints. We still keep the “draw lines first, then points” aesthetic to prevent the lines from covering the joints.
3. Draw the joint circles: Draw solid circles at the coordinates of each finger joint.
Final Verification
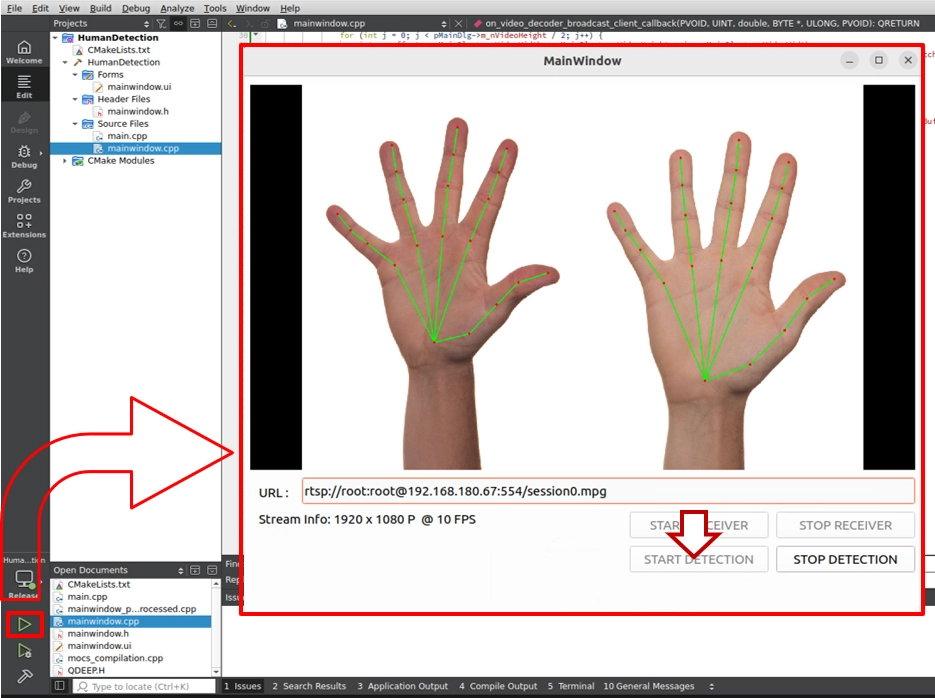
Click “Build and RUN” in the lower-left corner to run the project:
1. Start receiving and detecting.
2. Raise both hands in front of the camera and try opening your hands, making a fist, or making gestures such as “thumbs up  ” or “victory
  ”.
”.
➤ Helpful reminder (very important): When you first open this software (run the program), the interface may take a short moment to appear. Please do not worry. This is because we wrote the “load AI model” logic inside the constructor. During the first execution, the model must perform initialization configuration, and the system is working hard to load the large neural network weight files into the GPU. Once the software opens successfully after the first load, it means the AI brain is ready in the background. The next time you open the software, this initialization wait time will no longer be needed.
Congratulations. From full-body tracking in 10-10 to fingertip capture in 10-11, you have not only fully mastered the pose recognition models of the NexVDO SDK, but also learned how to write commercial-grade OpenCV drawing code with high reusability and high stability.